Showing posts with label tutorial on making a birds nest. Show all posts

Tuesday, April 3, 2012

Tutorial how to... Tie Dye Easter Eggs

This week with the Lovelies was time in the city of Grand Haven, at the lovely home of Ms. Laurie. Easter was her theme of the day. Our projects were to make tie dye easter eggs and nests to put our eggs in. So much fun and a great idea we could take home and do with our families. Thank you Laurie for a great lunch and a super fun project. 
This tutorial is very easy and I think you'll love the outcome as much as we did. You can do it, I thought it was Easy Peasy.

Things you will need:
Fresh Eggs
Old Silk ties (GoodWill or Salvation Army)
Scissors
Cotton Muslin (cut in 6x6" squares)
Pipe Cleaners
White Vinegar
Boiling water in large Stock Pot


Cut out the inside lining of each tie your going to be using, and then place right side toward egg and wrap the egg.


Be careful they are raw.

Wrap the silk covered egg with a piece of muslin. (that should have been cut into 6 x 6" squares)


Wrap just the outside the egg with a pipe cleaner that is cut in half.


Do this with each egg.

Add the eggs carefully to a boiling pot of water and then add a pint of white vinegar and boil for 30 minutes.

Any kind of white distilled vinegar will work.


You can also cover blown out eggs as well, you just have to be really careful with them. They also like to float to the top of the pot.


The fun begins when you unwrap the eggs. The color is bright and vibrant. Try to find silk ties that are not faded and have alot of geometric shapes they work the best. Do not use Cotton Ties.


We used a variety of colored ties, that kept them fun and whimsy. We then put them back in their original containers and then into the fridge for now, they will come out Easter Day.


So fun and easy peasy, you can do it!


We placed them into a moss covered nest that we made as well.


They also look good in a traditional wicker basket too.
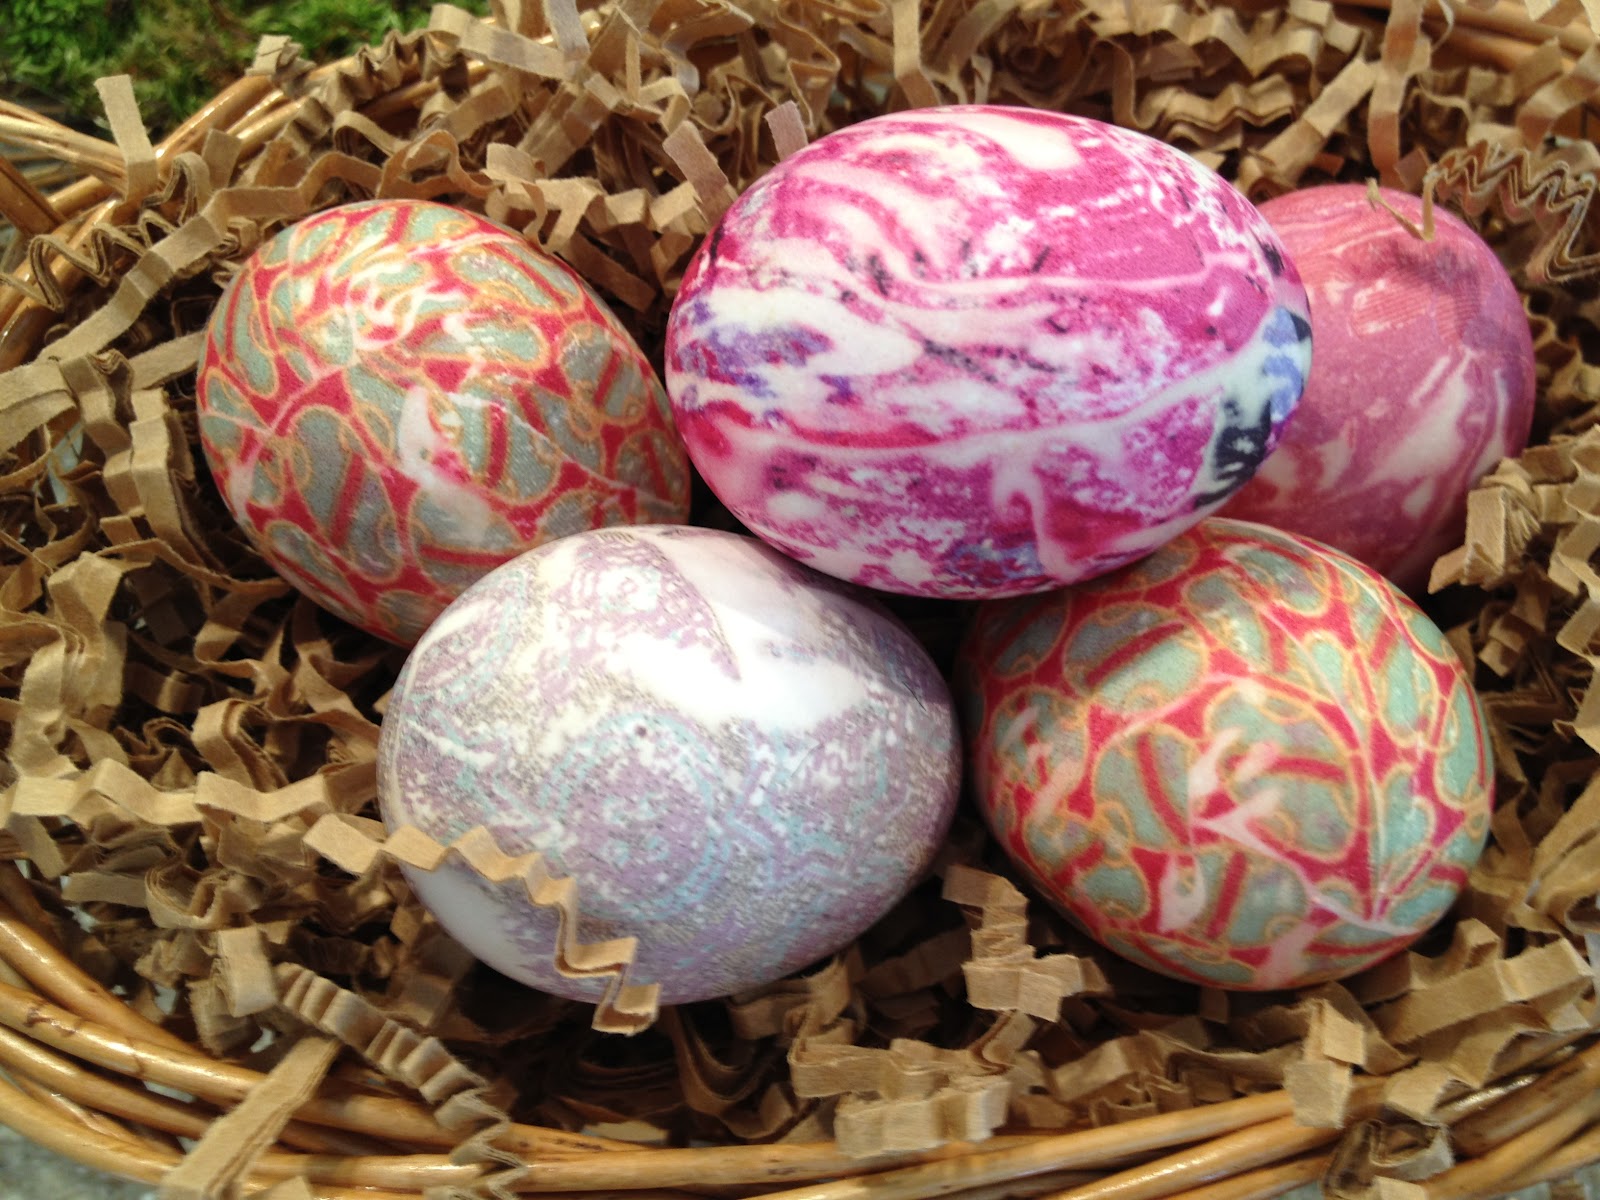

Look how pretty.

Can't wait to do this with the kids. The surprise inside is as much fun as wrapping them. They're gonna love this project.

Wednesday, January 11, 2012

Kicking Off the New Year with Creative Jewelry Making!


So we kicked off the new year by taking a drive to one of the lovelies summer home, which is in a nearby city of Grand Haven. It is a cute little lakeside community which offers beautiful beaches, golfing and fishing. We had a day which was about 45 degrees in Michigan, which is unheard of for the month of January. We have had basically no snow thus far and warm temperatures, alittle bit weird for this time of year. We started our morning by antiquing at one of many shops from Grand Rapids to Grand Haven. In search of treasures yet to be discovered!
Upon our arrival we were greeted by our lovely Laurie the host and these bright cheery Gerbera Daisys. So pretty when lined up in a row. I think if you love to make an impact it's a great idea to place your items in a row, repetition is candy for the eye!


So the project of the day was to rework old necklaces and create something new! Sweet Laurie had old jewelry that we had fun tearing apart. This beautiful focal charm was created by Sarah using a large chunk of amethyst, swarovski crystal, chips of quartz, pearls and a gold charm with words of love.


Here you'll find Jenny made a wonderful focal made from a picture frame (so clever) with large shell pearls, swarovski crystals, and glass crystals. If you try this, just remember to use a wire that fits through the hole of the pearls. They can be quite small at times. Such creativity! This pretty focal compliments her pearls so nicely!


Kimmie made a necklace using the same amethyst faceted stones that Sarah used adding irredescent briolettes and hammered silver chain! Oh so Lovely Kimmie.


Christy Louise used her creative spirit by using crystals and pearls. She made these oh so elegant earrings that measure approx. 1 3/4" which can be worn with anything. Way to go Christy!


I have always wanted to attempt making a birds nest, and I did it! I was so excited to bring something home. I used gold artistic thick non tarnishing wire and then added pearls for the eggs and topped it off by using a bird given to me by another lovely (Sarah). Thank you Sarah! I started by cutting off about 12" of wire and then making the loop at the top for the clasp. From there I just made a circle the size I wanted and twisted it about 4 times and once done with that I attached 3 seperate coils for security on the sides of the nest and then took thinner wire and added the eggs. Easy peasy I know you can do it! Top it off with charms of your choice and voila.