Tuesday, April 17, 2012

DIY Fun - Making Fairy Gardens

 This week our host was Lovely Kimmie and we all met at Everlasting Bloom in Grand Rapids, Mi. Upon our arrival we were greeted with boxed lunches by Honey Baked Hams and refreshing drinks. Our  table was set with the colors of spring, and our hostess added the pop of color with the addition of bright garden gloves and flowers at each table setting.
 The day was bright and sunny and infused with pops of color from our table setting. Thank you Kimmie for another creative tablescape. 
 Our box lunch with our little take away gift of work gloves. What a great idea! This was genius for the lovelies with gorgeous nails. 
 This enormous planter was at one end of our table and it was filled with the most beautiful succulents.
 Our lovely host had a  plan for DIY Fairy Gardens made of plants, flowers, pebbles, succulents, mini bridges,  tiny clay pots, ponds and of course fairies. The possibilities were endless. Kimmie scheduled a private time for us in the store with Kathy, and after a few minutes of instruction, we were cut lose in a house of flowers and fairies.
 Kim has raided her attic and she had many containers for us to choose from. She had wicker baskets, tin containers, wooden boxes and ceramic pots. Pictured here is a metal container with a small garden filled with succulents and plants along with a gate, pebbles, bird house and a wheelbarrow.
 Another picture of the same garden. When making this fun project, you could almost use anything for your mini garden. Just remember to line it, and your good to go. 

 A round metal bucket here for another inspiration we could draw from. This one had more flowers.
 Close up of the fairy and her garden tools. 
 Here you can see that the flower shop used a radio flyer for their garden! It looks like a vintage wagon. I am sure I could find something in my garage to use. Oh the possibilities.
 Oh yes a close up of our flowers! They were our dessert after our boxed lunch. From a distance they looked like real tulips. I didn't realize what they were until I sat down. Oh how clever and fitting for the day. 
 Check out the gummie worms. I think that we loved the dirt dessert and enjoyed eating them as much as any kid would. 
 Our group for the day. Top left: Laure Top middle: Kimmie Top right: Jenny
Lower left: Christy Lower middle: Betsy and Me (Tina) Lower right
 What a great impact when flowers are placed all together. 
 Here's one of our containers.
 First you line the container with a garbage bag and wrap over the top. If you are taking the container outside then you might want to make sure that you have drainage holes. If you are keeping it inside than you don't need the holes.
 Fill container with dirt to the top and put your plants close so you can just grab them. 
I picked mine out before I got started. 
 Think about where your going to put your little walk way, bridges, ponds etc...plan abit in your head.
 Kathy the owner giving Betsy some helpful hints that make the transplanting go easier. 
 Jenny contemplating her garden.
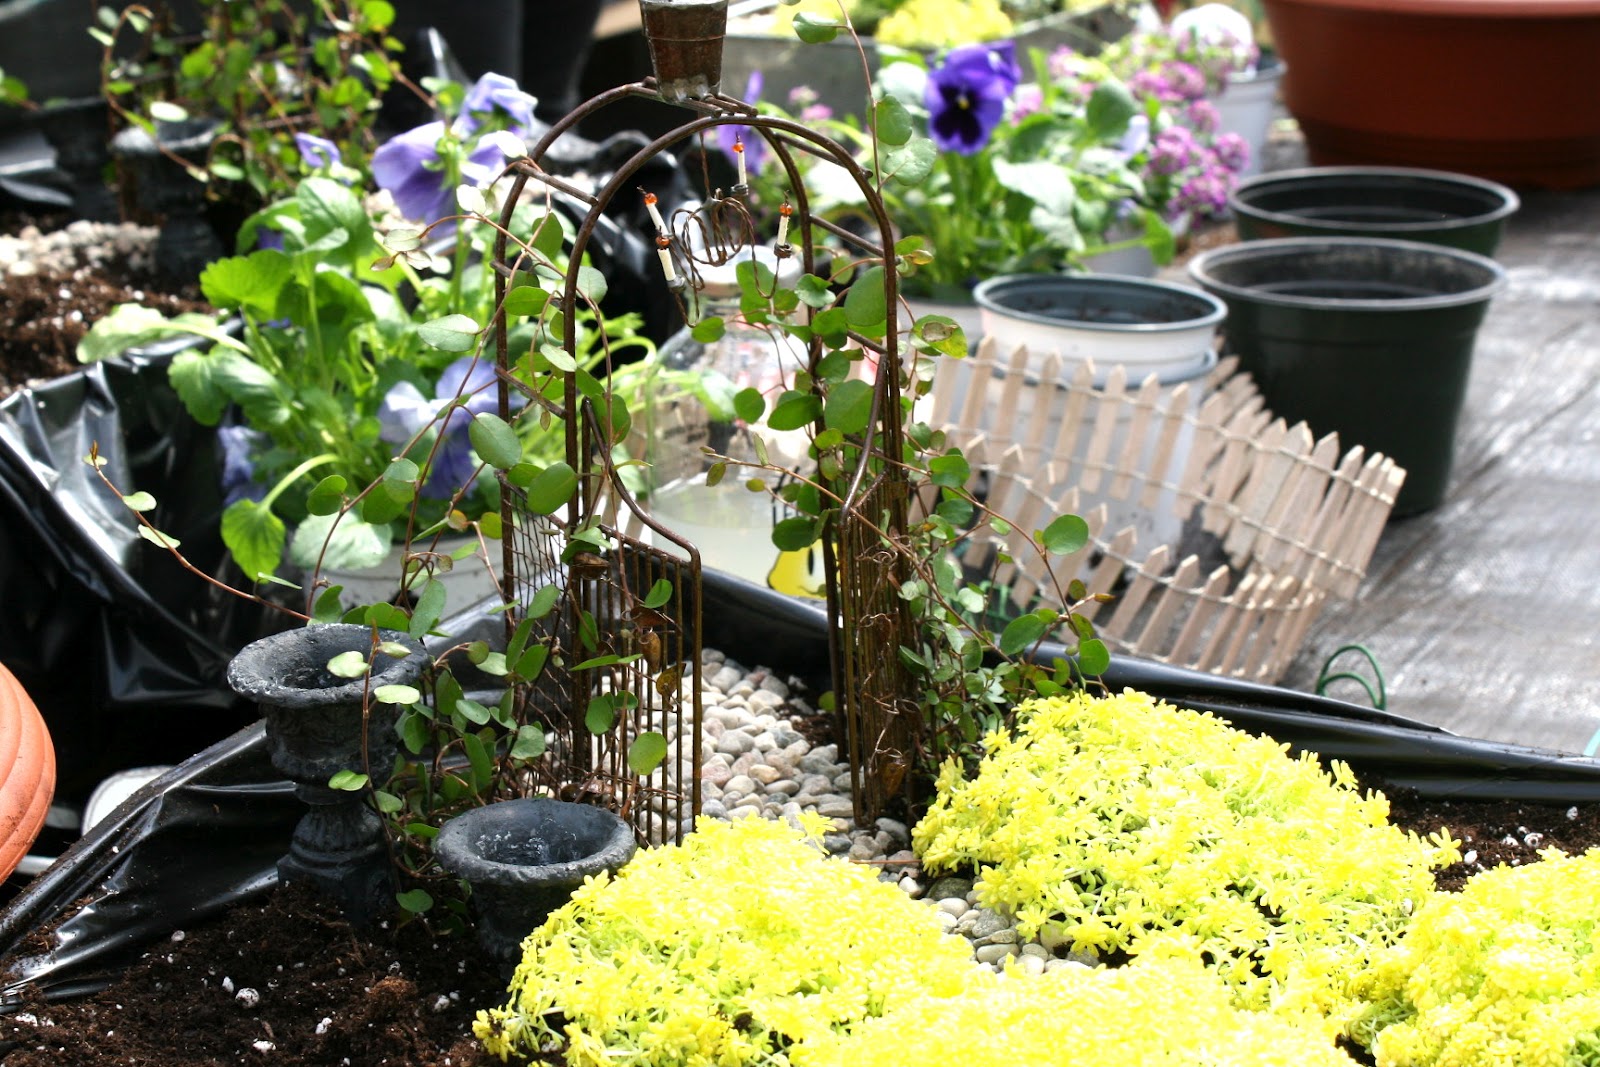
 Close up of my garden, love the black urns. 
 Lauries almost done, what a sweet little magical place. 

 Betsys finished garden. Can you spot her fairy? 
 Christy is working hard.
 I love Christys round container.

 Kimmies garden. I want to sit in that chair and read a good book.
 After completing my garden then I need to trim the plastic bag and tuck it down a little so it doesn't show. 
 These gardens look great in almost any container. This looks like another vintage container to me.
 Close up of a mini bistro set and glass cloche. I bet you could find doll house miniatures and add them.
Kim your garden is truly amazing. Thank you so much for a fun, creative and enjoyable day! We are never at a loss for crafts and projects. I know we are all so excited each and every tuesday when the Lovelies meet, just to see what the host comes up with. You outdid yourself, great workshop.

Recipe for the Flower and Dirt Dessert:

Ingredients

  • 1/2 cup butter, softened
  • 1 (8 ounce) package cream cheese, softened
  • 1/2 cup confectioners' sugar
  • 2 (3.5 ounce) packages instant vanilla pudding mix
  • 3 1/2 cups milk
  • 1 (12 ounce) container frozen whipped topping, thawed
  • 32 ounces chocolate sandwich cookies with creme filling

Directions

  1. Chop cookies very fine in food processor. The white cream will disappear.
  2. Mix butter, cream cheese, and sugar in bowl.
  3. In a large bowl mix milk, pudding and whipped topping together.
  4. Combine pudding mixture and cream mixture together.
  5. Layer in flower pot, starting with cookies then cream mixture. Repeat layers.
  6. Chill until ready to serve.
  7. Add artificial silk flower and gummie worms. Enjoy!

Tuesday, April 3, 2012

Tutorial how to... Tie Dye Easter Eggs

This week with the Lovelies was time in the city of Grand Haven, at the lovely home of Ms. Laurie. Easter was her theme of the day. Our projects were to make tie dye easter eggs and nests to put our eggs in. So much fun and a great idea we could take home and do with our families. Thank you Laurie for a great lunch and a super fun project. 
This tutorial is very easy and I think you'll love the outcome as much as we did. You can do it, I thought it was Easy Peasy.

Things you will need:
Fresh Eggs
Old Silk ties (GoodWill or Salvation Army)
Scissors
Cotton Muslin (cut in 6x6" squares)
Pipe Cleaners
White Vinegar
Boiling water in large Stock Pot


Cut out the inside lining of each tie your going to be using, and then place right side toward egg and wrap the egg.


Be careful they are raw.

Wrap the silk covered egg with a piece of muslin. (that should have been cut into 6 x 6" squares)


Wrap just the outside the egg with a pipe cleaner that is cut in half.


Do this with each egg.

Add the eggs carefully to a boiling pot of water and then add a pint of white vinegar and boil for 30 minutes.

Any kind of white distilled vinegar will work.


You can also cover blown out eggs as well, you just have to be really careful with them. They also like to float to the top of the pot.


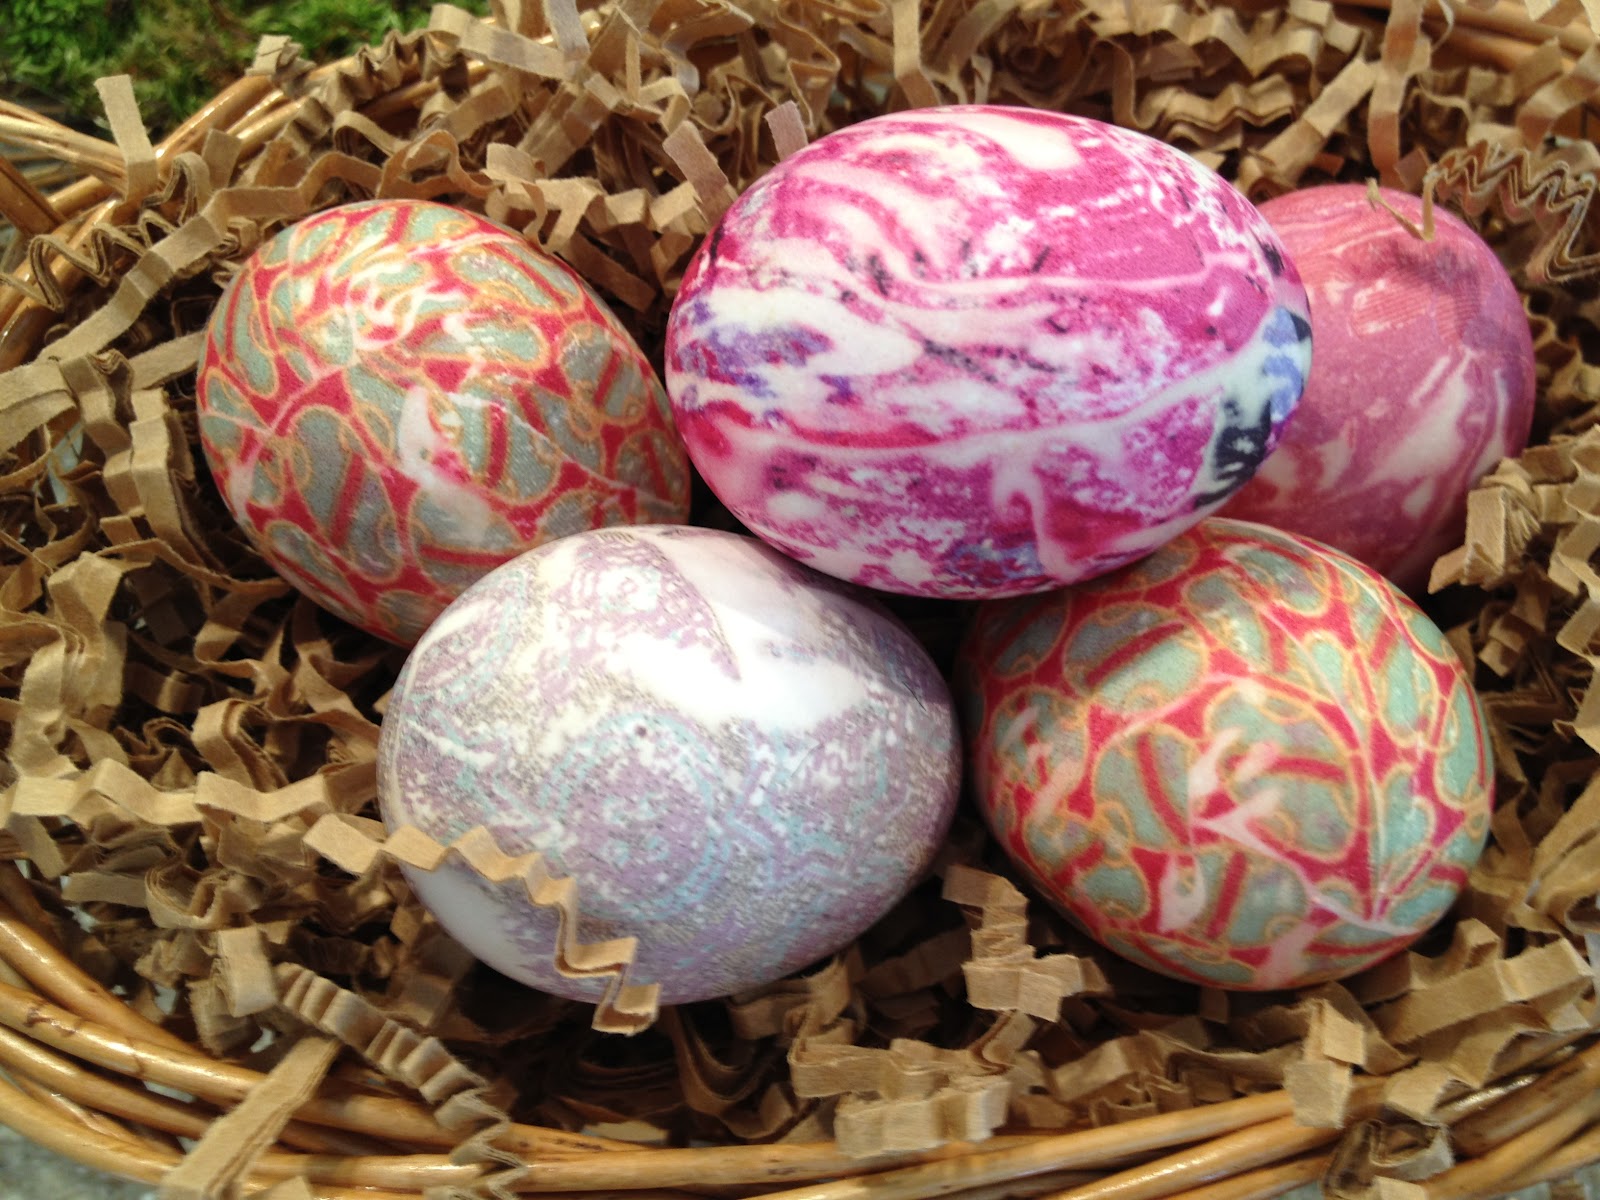
The fun begins when you unwrap the eggs. The color is bright and vibrant. Try to find silk ties that are not faded and have alot of geometric shapes they work the best. Do not use Cotton Ties.


We used a variety of colored ties, that kept them fun and whimsy. We then put them back in their original containers and then into the fridge for now, they will come out Easter Day.


So fun and easy peasy, you can do it!


We placed them into a moss covered nest that we made as well.


They also look good in a traditional wicker basket too.


Look how pretty.

Can't wait to do this with the kids. The surprise inside is as much fun as wrapping them. They're gonna love this project.

Tuesday, March 27, 2012

Luncho Making Olive O


Since I write the blog it's kind of strange to compliment myself so I am not going to do that. I will just jot down a few things I did to get the table setting and the project going for the lovelies. Pictured above you'll see that I used outdoor urns to decorate. I added a faux head of cabbage in the light tall urn for a garden feel. I used a real plant with bright color in between two green plants placed in a moss wrapped planter, and on the opposite end I used a tall thin artificial grass in a terra cotta colored urn. I pretty much started there for the theme. Keeping the three urns similar in size, as not to block the view too much for the guests. They do need to visit with their friends across the table.


 Here you can see that I used burlap for a tablecloth, followed with a champagne colored chiffon fabric, twisted and placed through the center. I placed the urns in the center of the table as well. The moss placemats gave a great texture as did the wicker round ones. I used a dark green dinner plate with a flower motif salad plate, for that continuity. When I do a tablescape I try to keep in mind size, texture, shape, color and theme. The lovelies are so generous when they host, they usually serve great meals along with a little gift or a treat for each gal to take home, as well as their project. I placed a long strand of yellow pearls in a satin jewelry bag for each tablesetting which add to the spring-garden feel. Easter really helped convey my vision.


This is the other end of the farm table. I had a ceramic bunny as well an 8 foot grapevine and floral garland woven between the urns to give some depth and texture also helping to convey the theme. I used as much green as I could without over powering the table. The glasses were a handblown green glass from Mexico, and I also used green glasses I found at Tuesday Mornings.


After a light lunch of fruit with poppy seed dressing, lettuce wraps and lemon bars. We moved to the kitchen for a fun time of infusing vodka and olive oil.


The lovelies hard at work infusing and tagging their product.


 Miss Sarah very hard at work labeling. I purchased the bottles online and the labels at Michaels. 


Shaved lemon peel and lime peel for our vodka.


The lovelies sure are creative with their herbs and spices, and their labels. They look like they are ready for shipping. Way to go girls, your awesome.


Poppy Seed Dressing
(for fruit of your choice) suggestions: pineapple, bananas,
grapes, apples, mandarine oranges, berries.
Ingredients
  1. 1/3 cup white sugar
  2. 1/2 cup white vinegar
  3. 1 teaspoon salt
  4. 1 teaspoon ground dry mustard
  5. 1 teaspoon grated onion
  6. 1 cup vegetable oil
  7. 1 tablespoon poppy seeds
Directions
  1. In a blender or food processor, combine sugar, vinegar, salt, mustard and onion and process for 20 seconds. With blender or food processor on high, gradually add oil in a slow, steady stream. Stir in poppy seeds
Thai Chicken Lettuce Wraps
  • 1 pound ground turkey or (chicken) we also added brown sugar and sesame oil
  • 1/4 cup sugar
  • 2 tablespoons fresh lime juice
  • 2 large garlic cloves, finely minced
  • 1 large jalapeno pepper, chopped fine
  • 1 teaspoon garlic chili sauce or tabasco sauce
  • 2 tablespoons soy sauce
  • 1 tablespoon sesame oil
  • 2 tablespons vegetable oil
Sauce (set aside at table) we doubled the recipe
  • 3 table spoons rice wine vinegar
  • 1/4 cup sugar
  • 4 teaspoons garlic, minced
  • 2 teaspoons finely grated ginger
  • 1.5 teaspoons Asian sesame oil (Kadoya)
  • 2 tablespoons water
  • 1 European cucumber, peeled, dices
  • 1 cup bean sprouts (omitted)
  • 1 cup grated carrots
  • 1/4 cup mint leaves (omitted)
  • 1/4 cup cilantro leaves (omitted)
  • 2 tablespoon chopped roasted peanuts or cashews (omitted)
  • 1 head of leaf lettuce
  • Bottled sweet chili sauce
Instructions
  1. In a saute pan mix and start to cook together the chicken, basil, lime juice, garlic, jalapeno,tasbasco
  2. Continue cooking in medium skillet,  add sesame and vegetable oil until hot over medium high heat, add soy and cook through
  3. For the sauce - heat vinegar, and add sugar to pan and cook until sugar dissolves. Add the garlic and the crushed red pepper, soy sauce, ginger, sesame oil and water. Place sauce in a small pitcher and serve on the side. Put the spouts, mint, cilantro and peanuts into small bowls or in piles on a large tray. Arrange the lettuce leaves into a pile. Wrap the chicken and toppings in the lettuce leaves. Serve the soy marinade and sweet chili sauce on the side if desired.
CONNIE'S LEMON BARS

For the crust mix together:
2 C flour
1/2 C powder sugar
1 C butter

Press into 9 x 13 pan and bake at 350 for 20 to 25 minutes.

While the crust is baking blend together until thick:
4 eggs
2 C sugar
1/3 C lemon juice (2 lemons)

To the egg mixture add 1/4 cup flour and 1/2 tsp baking powder and blend (I use a wisk till it is smooth).
Pour over baked crust and return to oven. Bake at 350 for 25 minutes (or right before it barely begins to
brown). Sprinkle with powder sugar.  Let cool before cutting..

Lovely Lauries Birthday Party


Lovely Laurie, the birthday girl.


We celebrated our lovely Lauries birthday at the home of Christy Louise with the decorations of Easter very present. The afternoon was started with a toast from the host and a beautiful prayer honoring our friendship and our lovely families and the time we are blessed to share with one another.


Our lunch of various salads, was so delicious complimented with onion bread from our local Charlies
Crab, and ever so tasty key lime pie which was amazing for the finish.


 After opening gifts with the birthday girl, our project was to make birds nests. We had about 4 different recipes, which included pretzels, chow mein noodles, white chocolate, milk chocolate, corn flakes,
candy eggs and coconut. Simple a bit messy, but so fun and yummy.


Pictured here is milk chocolate, peanut butter mixed with chow mein noodles. Very easy peasy to make.


One of my favorites here is white chocolate, chow mein noodles, coconut and eggs. Lovely!


Recipes:

Melt the chips in your microwave and quickly add the peanut butter before it cools. (or you can put in the microwave too.)
Depending on your microwave, should be a couple of minutes. Mix in large bowl and add chow mein noodles, work quickly. Then use Pam in muffin tins and add mixture, put in freezer to cool. They come out real easy. Do the same for each recipe below.

2 cups butterscotch chips
1 cup peanut butter
2 cups chow mein

2 cups milk chocolate
1 cup peanut butter
2 cups chow mein noodles


2 cups mini marshmallows
1/4 cup butter
4 cups chow mein noodles

12 oz. white chocolate
24 oz. chow mein noodles

Friday, March 2, 2012

Girls Hit the Shooting Range


 This week we had 2 fun events combined into 1. We celebrated Jennys birthday and we tried our hand at shooting. Wow, it was really interesting, serious and fun all in one. I really wasn't sure what to expect but we did it and learned, and we will certainly go back. As the weather warms perhaps we'll go skeet shooting next time. Our lovely Betsy hosted a fun filled day by planning the lunch and our time at the Silver Bullet Shooting Range, which was a big success!
Pictured above is the bag which Ms. Sheryl made out of camo material, which was filled with hunting gear, candy and cupcakes. With such creativity, I know who I'm calling for my next party, both of these amazing women. 


 Laurie is modeling our gear that was in each goodie bag. Thanks Laurie for the snapshot!


Here we are waiting for the rest of girls to attend the festivities!


 A quick picture before heading out to the shooting range.


Jenny the birthday girl, opening some of her presents.


Betsy getting her instructions on shooting a 22.


Kimmie learning how to hold her hands on that 22.


Sheryl ready for shooting.


Girls in the booth.


 Annie Oakley don't get your gun! I have a couple of bulls there, saweet!


Bullseye, look out

I love our Tuesday crafternoon time, you'll never know what we are going to do next. It's not easy to organize a workshop or come up with fun activities that we will all enjoy. So I applaud you Lovelies for making the effort to keep us learning, creating and sharing! 

"Don't walk in front of me, I may not follow.
 Don't walk behind me, I may not lead.
 Walk beside me and be my friend." 
                                - Albert Camus 

Tea Time at Jennys

 Our weekly gathering was hosted on the 21st of February by our one an only Lovely Jenny. She had a perfect day for hosting a luncheon and tea event, because the day was a bit chilly and rainy.  We all felt the desire to nestle in and getting comfy, considering we started at 12:30 ish and never left until 5:30. This type of gathering works even better when the hubbies are out of town and we can stay and finish our amazing projects. Pictured here are Jennys tea cups/ coffee cups which are stunning! Don't you just love some bling on your table?

The stage was set with the colors of silver, gold, ivory, clear glass and white. Wow, what an impact this makes when you want an elegant table. She had positioned little gold tea-lights and gold tipped butterflies throughout the table for added sparkle.

 Pictured here is the layering she used for each table-setting. Simple stunning!


A close-up of the gold beaded napkin rings and butterflies used.

For our craft, we made patterns for gloves and mittens, along with continuing our knitting project from the week before.  Pictured here is my attempt to make gloves. I just have to embellish them with vintage buttons and lace or ribbon and they will be done. Thanks Jenny for a great lunch and tea,  and allowing us to stay so long and making us feel at home.